How To Make A Yoyo Quilt
Beginner Quilting Instructions
If you are interested in an advanced quilting technique you might want to learn how to make a yoyo quilt. Every person has some of their favorite quilting types. Yoyo quilts are my favorite ones. Though people might comment that these are the most difficult ones to make, out of all quilt types. Yoyo quilts look more intricate than the other ones.
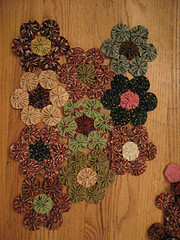
Yoyo quilts were more famous in 1930's and 1940's. They have come into limelight again. Yoyos are small rosettes made up of cotton preferably. These rosettes are made by gathering and stitching fabric into a circle. These rosettes are then joined to each other to form a certain quilting pattern. Yoyos are generally made with printed fabrics.
You can make them with any fabric because it does not require ironing. And for this reason you can use any batting type. Yoyos are sometimes attached to a large piece of fabric, which can then be treated just like any other quilt top. Yoyo quilts can also be used for so many other purposes just like yoyos in a mixture of colors and sizes, after that they can be used in making an applique quilt. They can be appliqued on in a pattern and make lovely flowers.
How to make a yoyo quilt is tricky but once you have made a few, you will be able to quickly and easily. Get your tools and supplies ready. Yoyo quilts look great with variations in colors and prints. Now let's make a yoyo quilt.
1. The first step is to make your mind how large would you like your yoyos to be and make a circular cut-out template double that size plus about 1/2". A plastic or cardboard template works well enough.
2. Position the circle template on the right side of your fabric, if you are right handed otherwise place it on the left and trace around it lightly with a pencil or chalk marker. Leave about 1/2" among circles.
3. Cut out circles about 1/4" past the line.
4. Thread a hand sewing needle with quilting thread. If you use regular thread, sew with two strands. Knot the end of the thread and bring it up from the reverse side while folding under the circle on the line.
5. Continue sewing around the circle, folding under the seam allowance as you go.
6. When you reach the starting point, tug on the thread to gather the circle into a rosette.
Leave a hole in the middle of the yoyo.
7. Distribute the gathers and secure the thread with a few backstitches, then make a knot for extra security.
8. Trim excess thread, re-knot and make another yoyo.
9. Arrange the yoyos into rows and make them according t the selected design.
10. Now join two yoyos. You can start from the centre or from any side, as you would like to do. Repeat, adding more yoyos to finish the row. Attach rows together in the same way.
11. Yoyos can be sewn to a bigger piece of fabric, then layer with batting and bind around the edges.


